
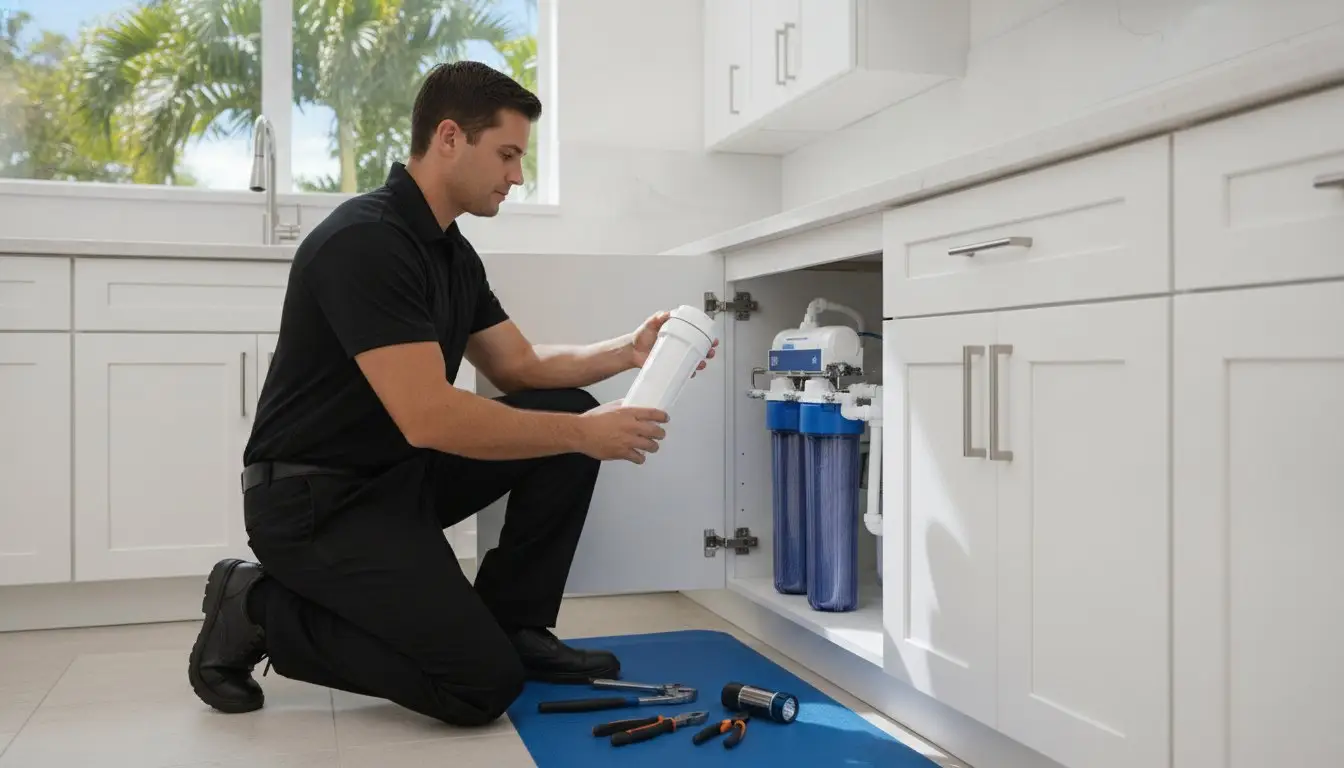
You’ve just poured a glass of water in your Port St. Lucie kitchen, but instead of a refreshing drink, you’re met with a faint smell of chlorine and a frustratingly slow trickle from the dispenser. It’s a common frustration for many of us here on the Treasure Coast, where our local groundwater requires significant disinfection and mineral management. You rely on your filtration system to keep things tasting crisp, so when the flow drops or a stuck housing prevents a quick fix, it’s easy to feel overwhelmed by the maintenance. We understand that a simple chore can quickly turn into a stressful afternoon when parts won’t budge.
The good news is that mastering an under sink water filter replacement doesn’t have to be a headache. This guide will provide the clear, step by step instructions you need to ensure your family has access to safe, clean drinking water without the risk of leaks. We will walk you through the process of loosening stubborn housings, choosing the correct 2026-compliant cartridges for Florida’s unique water conditions, and establishing a maintenance schedule that fits your lifestyle in Stuart or Fort Pierce. By the end of this article, you will have the confidence to handle this essential home task with the steady hand of a pro.
Key Takeaways
- Identify the clear physical signs that your filter is failing, from reduced water flow to unusual chlorine or sulfur smells.
- Understand why Treasure Coast mineral levels often require an under sink water filter replacement sooner than the manufacturer’s general recommendation.
- Learn the critical “no-mess” secret of depressurizing your system to prevent spills and ensure a leak-free seal during installation.
- Discover professional techniques for safely loosening stuck filter housings without damaging your kitchen’s plumbing.
- Master the 2026 maintenance schedule needed to keep your Florida home’s drinking water crisp and safe year-round.
When to Perform an Under Sink Water Filter Replacement
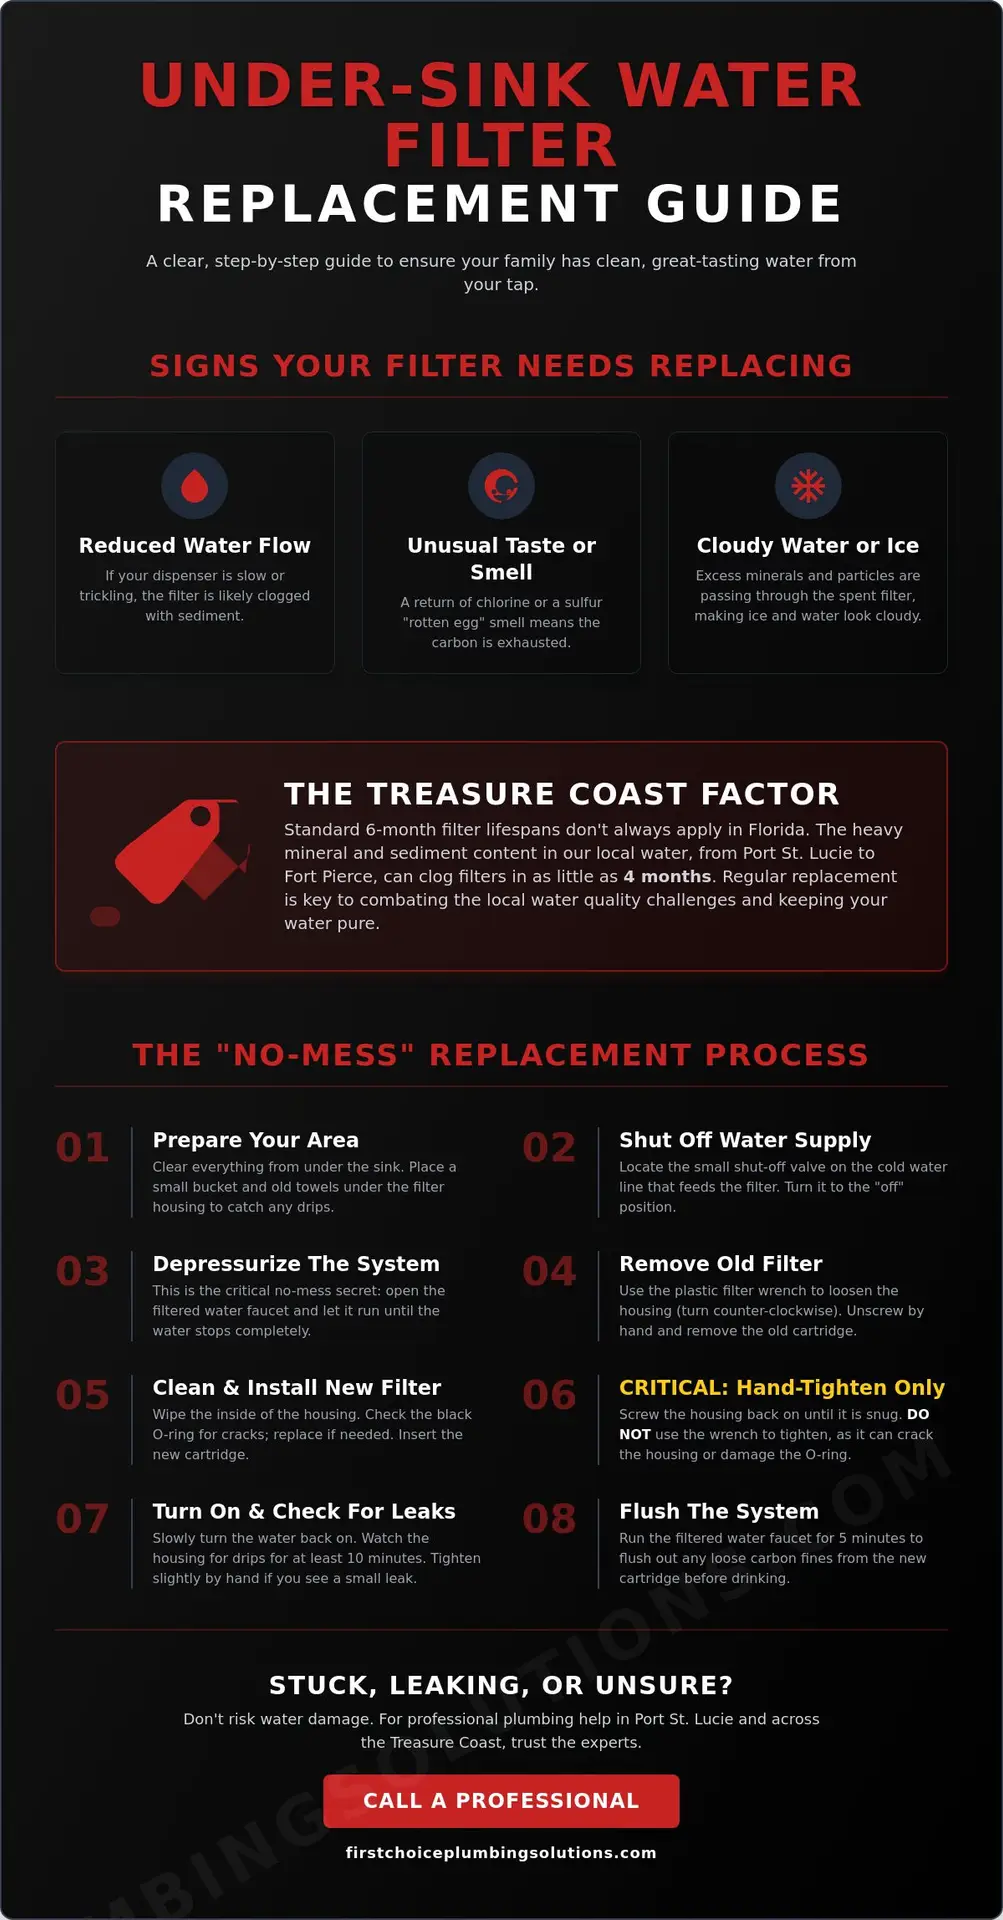
Your filter doesn’t come with a dashboard warning light, but it definitely signals when it’s reaching the end of its life. The most obvious sign is a noticeable drop in water pressure at the dispenser. If filling a pitcher takes twice as long as it did last month, the internal pores of the cartridge are likely choked with sediment. You might also notice “cloudy” ice cubes or a subtle return of that chemical chlorine taste. These physical cues mean your under sink water filter replacement is already overdue.
Living on the Treasure Coast adds a specific layer of urgency often called the “Florida Factor.” While manufacturers often suggest a six month lifespan, our local water from the Floridan and Surficial aquifers can be heavy with minerals and sediment. In areas like Fort Pierce and Jensen Beach, high sediment loads can clog a standard filter in as little as four months. The Florida Department of Environmental Protection’s 2026 Integrated Water Quality Assessment highlights the ongoing challenges of managing groundwater quality, which directly impacts how hard your home’s filtration system has to work.
Delaying maintenance isn’t just about taste; it’s about hygiene. Carbon filters work by trapping contaminants within their porous structure. If left too long, this organic material can actually become a breeding ground for bacteria right inside the filter housing. Regular maintenance ensures your water quality solutions continue to protect your family rather than creating a secondary issue.
Identifying Your Filtration System Type
Before you head to the store, you need to know what’s under your sink. Most Port St. Lucie homes use either carbon block cartridges or Granular Activated Carbon (GAC) systems. If you have a Reverse Osmosis (RO) setup, you’ll manage multiple stages, including pre-filters, a semi-permeable membrane, and a final polishing filter. Understanding the different types of water filters is the first step in ensuring you buy the correct replacement parts for your specific model.
The Impact of Local Water Quality
Municipal water in St. Lucie West and Traditions is treated with chlorine to ensure safety, but this chemical eventually exhausts the carbon in your filter. For those on private wells in more rural parts of the Treasure Coast, sulfur smells and iron bacteria can be even more aggressive. These local conditions mean a “one size fits all” maintenance schedule rarely works for Florida homeowners. Monitor your water’s performance closely and stay proactive with your under sink water filter replacement to keep your drinking water crisp.
Step-by-Step Guide to Replacing Your Under Sink Filter
Performing an under sink water filter replacement is a straightforward task, but skipping small details can lead to a messy kitchen cabinet. Before you begin, clear out the area under your sink. You will need a small bucket, a few old towels, and the correct replacement cartridge for your specific system. Having these ready prevents a frantic search for a cloth while water is dripping onto your wood cabinetry.
Preparation and Safety Steps
Start by locating the dedicated shut-off valve. This is usually a small T-handle or knob on the cold water line leading to your filter. Once the water is off, you must perform the “No-Mess” secret: open the filtration faucet and leave it open until the water stops flowing. This step depressurizes the line. Without doing this, the built-up pressure will cause water to spray the moment you loosen the housing. If your shut-off valve feels stuck or corroded, it might be time for professional plumbing repairs to ensure you can safely manage your water quality solutions in the future.
Installing the New Cartridge
Unscrew the filter housing using the plastic wrench provided with your system. Once the old cartridge is out, take a moment to wipe the inside of the housing with a clean, damp cloth to remove any accumulated sediment. Before inserting the new filter, inspect the black rubber O-ring. If it looks flattened or cracked, replace it to prevent leaks. Slide the new cartridge into place and screw the housing back on by hand.
Follow the “Hand-Tight” rule strictly. Never use a wrench to tighten the housing; over-tightening can crack the plastic or crush the O-ring. Turn the water back on slowly and check for leaks during a 10-minute observation window. Finally, run the water for five minutes to flush out any loose carbon fines. This ensures your first glass of water after your under sink water filter replacement is perfectly clear and crisp.
Troubleshooting Common Filter Replacement Issues
Even when you follow the steps perfectly, a routine under sink water filter replacement can throw a curveball. Stuck housings are a common headache for homeowners in St. Lucie West and Traditions. Mineral deposits from our local groundwater can act like glue on the threads, making the sump nearly impossible to turn. If yours won’t budge, don’t reach for a heavy metal pipe wrench. The excessive force will likely crack the plastic manifold. Instead, try a rubber strap wrench, which provides a firm grip without crushing the housing.
Common Post-Installation Problems
Don’t panic if your first few gallons of water look “milky.” These are just microscopic air bubbles trapped in the new carbon media. The water will clear up on its own within 24 hours. If you experience a sputtering faucet, you have a minor airlock. Simply keep the water running for a few minutes to purge the line. If you notice a slow drip from the housing, the O-ring likely slipped during assembly. Shut off the water, depressurize the system, and ensure the seal is seated perfectly flat. If a leak persists despite your best efforts, it’s safer to call for professional plumbing repairs before a small drip causes water damage to your cabinetry.
When to Upgrade Your System
Plastic filter housings have a limited lifespan. If yours is over five years old or shows hairline “spider” cracks, it’s time to replace the entire unit. For families in Palm City or Stuart dealing with persistent sediment issues, moving from a single-stage filter to a multi-stage system can significantly improve the taste and clarity of your water. In some cases, the problem isn’t the filter but the plumbing itself. If your water quality remains poor even after a successful under sink water filter replacement, you might need to consider a whole house repipe. Older, corroding pipes can shed debris directly into your fixtures, bypassing the benefits of a point-of-use filter.
Keep Your Treasure Coast Water Crisp and Clear
Maintaining your home’s filtration system is one of the most effective ways to protect your family from the sediment and chlorine levels common in our local groundwater. By staying proactive with your under sink water filter replacement, you ensure that every glass of water in your Port St. Lucie or Fort Pierce home stays refreshing and safe. Remember to depressurize your system to avoid a mess and always inspect your seals to prevent hidden water damage under your cabinets.
First Choice Plus Plumbing & Air has provided reliable service to this community for over 15 years. As a family-owned business led by Manuel J. Duran Jr., we take pride in offering the steady hand and technical expertise our neighbors expect. We provide 24/7 emergency support for residents in Jensen Beach and Stuart, ensuring you’re never left dealing with a plumbing crisis alone. If you’ve encountered a stubborn filter housing or want to explore more advanced filtration options, we are ready to assist.
Schedule your professional water quality consultation with First Choice Plus today! Enjoy the peace of mind that comes with knowing your home’s water is in expert hands.
Frequently Asked Questions
How often should I really change my under-sink water filter in Port St. Lucie?
You should generally change your filter every four to six months in Port St. Lucie. While some manufacturers suggest longer intervals, our local groundwater contains higher levels of sediment and minerals that can clog cartridges prematurely. If you notice a drop in pressure or a change in taste, it’s time for an under sink water filter replacement. Keeping a consistent schedule prevents bacterial growth and ensures your water quality remains high year-round.
Why is my water filter housing stuck and how can I get it off?
Filter housings usually get stuck because of internal water pressure or mineral deposits that have “cemented” the threads over time. First, ensure you have fully depressurized the system by opening the filtration faucet after turning off the water. If it still won’t budge, use a rubber strap wrench to provide even torque without cracking the plastic. Avoid using heavy metal wrenches; they often apply too much force and can shatter the housing.
Do I need to turn off the main water supply to change an under-sink filter?
You typically don’t need to shut off the main water supply for the entire house. Most systems are installed with a dedicated shut-off valve on the cold water line under the sink. Simply turn this small valve to the “off” position before starting your under sink water filter replacement. However, if you cannot find a local valve or if the valve is leaking, you may need to use the main house shut-off to prevent a mess.
Why does my water taste like plastic after a new filter replacement?
A plastic or metallic taste after a filter change usually means the new cartridge hasn’t been flushed long enough. Manufacturers often apply food-grade preservatives or have loose carbon fines that need to be washed away before drinking. Run your water for at least five to ten minutes continuously after installation. This process clears out the “new filter” taste and ensures the carbon media is fully saturated and ready to perform correctly.

Article by
Written by First Choice Plus Plumbing & Air Team
This article was created by the team at First Choice Plumbing Solutions, a licensed and experienced plumbing and HVAC company serving Port St. Lucie, Land O’ Lakes, and surrounding areas.
Our team specializes in plumbing and air conditioning services, including drain cleaning, leak detection, water heater repair and installation, AC repair, maintenance, and system installations. Our content is based on real-world experience and the common issues we solve for homeowners and businesses every day.
We aim to provide accurate, helpful, and easy-to-understand information so you can make informed decisions about your plumbing and HVAC needs.
If you need reliable, professional service, First Choice Plumbing Solutions is here to help.
Disclaimer
Disclaimer: The information provided in this article is for general informational purposes only and does not constitute professional plumbing or HVAC advice. Every situation is different, and readers should consult a licensed professional for proper diagnosis and repair. First Choice Plus Plumbing & Air is not liable for any damages or losses resulting from the use of this information.